
I took a long hiatus, partly due to a broken camera, due to my vacation, and quite frankly, due to the summer and a distaste for heat!
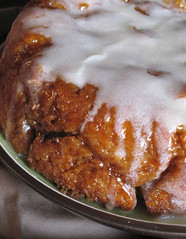
Last week, I got a new camera and I saw a picture of monkey bread on Serious Eats. I've never even heard of monkey bread before, but I have a soft spot for anything containing a lot of brown sugar and covered in glaze! I absolutely had to try it, but between the fact that I don't regularly stock whole milk in the fridge and I wasn't sure if I could put aside enough time, I kept putting it off.
Today, I bought a small bottle of milk from the corner deli with the full intention to start right after getting back. However, I decided that I needed to rest my feet a while, but while I was watching TV, I found myself snoozing. Two hours later, I got up, started the dough and went to the gym (to lessen the guilt, for sure). It was actually nice to work in the steps between other daily activities. =)
Monkey Bread
Cook's Illustrated via Picky Cook
Dough:
2 tbsp softened butter
2 tbsp melted butter
1 c warm milk
1/3 warm water
1/4 c granulated sugar
2 1/4 tsp instant yeast
2 tsp table salt
Coating:
1 c light brown sugar
2 tsp ground cinnamon
8 tbsp unsalted butter (1 stick)
Glaze:
1 c confectioner's sugar
2 tbsp milk
1) Heat oven to 200 degrees. When the over reaches the right temperature, turn it off. Butter the inside of a bundt pan with the 2 tbsp of softened butter. (I don't have one, so I just used a deep circular pan.)
2) In a large measuring cup, mix together milk, water, melted butter, sugar, and yeast. Set aside.
3) Mix flour and salt in a standing mixer fixed with the dough hook set on the lowest setting. Slowly add milk mixture. After dough comes together, increase the speed to medium and mix until the dough is shiny and smooth (6-7 minutes). *can add up to 2 tbsp flour if to sticky*
4) Turn dough onto lightly flowered counter and knead briefly to form smooth, round ball. Coat large bowl with nonstick cooking spray and place the dough ball in the bowl. Spray some nonstick spray over the dough. Cover in plastic wrap and place in prewarmed oven until the dough doubles in size, approximately 50 minutes.
5) While the dough is rising, mix the brown sugar (light brown!) and cinnamon together in a bowl. In a second bowl, heat up butter.
6) When dough has risen, gently remove the dough and pat into a 8"x8" square. Using a knife, cut the dough into 64 pieces (1 inch squares).
7) Roll each square into a ball. With one ball at a time, dip into melted butter, allowing excess butter to drip off. Roll in brown sugar mixture, then layer the balls in the buttered bundt pan.
8) Cover the budt pan tightly with plastic wrap and place in the turned-off oven until the dough balls have risen again (50-70 minutes).
9) Remove pan from oven and heat oven to 350 degrees. Unwrap the pan and bake until the top is deep brown and the caramel has begun to bubble around th eedges ~30-35 minutes. Cool in pan for 5 minutes before turning out onto a platter (if left in too long, the pieces may fall apart when the pan is turned).
10) Whisk confectioner's sugar and milk in a small bowl until the lumps have disappeared. Drizzle glaze over the warm monkey bread. Serve warm.
Note: The first few bites oddly reminded me of Apple Jacks...Sweet cinnamon!
xoxo,
lemonie
Tuesday, August 11, 2009
Tuesday, June 9, 2009
Brown Sugar Craving...
For some reason or another, I've been craving brown sugar. I was looking for brown sugar recipes online when I started thinking about browned butter. Browned butter is butter that is ever so slightly burnt and it makes a huge difference in taste. My first introduction to browned butter came via the Treats Truck and Kim's browned buttercream sandwich cookies. They're delicious...and it was a real treat to find a recipe with a picture of very similar looking cookies on the Land O'Lakes website.
This recipe is super easy. Except that I consistently fail at having the patience to make things pretty. The dough is supposed to be rolled into a log, chilled, and then sliced, but I barely rolled it into a log and I sloppily wrapped wax paper around it before tossing it in the freezer for 45 minutes. It was really lopsided when I took it out! I tried to redeem myself after slicing to make them more circular, but then the cookies weren't very neat anymore. Sigh! I guess this was a shortcut that really failed.
But the cookies were good. Very similar to what's offered at the Treats Truck. I made the frosting before the cookies, so they had dried out a bit before I sandwiched them and they cracked when I squished the two cookies together. Still tasted good. I really liked the browned butter cream. The cookie was pretty good, too, and just hard enough to properly press into sandwiches, but still soft enough to not be crunchy when bitten into.
Browned Butter Sandwich Cookies. Adapted from Land O'Lakes
1 c soft butter (2 sticks)
2/3 c firmly packed brown sugar
2 egg yolks
1/2 tsp vanilla
2 1/2 c ap flour
1/4 tsp salt
1) Beat butter and brown sugar at medium speed until creamy.
2) Add egg yolks and vanilla, beating until well mixed.
3) Reduce speed to low, add flour and salt. Beat until mixture becomes a dough.
4) Divide dough in half. Shape each half into a log about 1 1/2" in diameter. Wrap in plastic and chill for 3 hours or overnight.
5) Preheat oven to 350 degrees. Using a sharp knife, cut each log into 1/8" slices. Place 2" apart on ungreased cookie sheets and bake until edges are lightly browned ~9 minutes.
Cream Filling
1/4 c butter
2 c powdered sugar
1 tsp vanilla
2 tbsp heavy cream
1) Melt butter in a saucepan over medium heat, stirring occasionally until butter starts to brown. Immediately remove from heat and cool for 5 minutes.
2) Add powdered sugar, vanilla, and 1 tbsp heavy cream. Add more cream as necessary for desired spreading consistency.
Note: So I learned that flour is added last and at the lowest speed to help prevent too much gluten from building up. I wonder what the texture of a cookie with too much gluten is like. Perhaps breadlike?
Monday, May 25, 2009
Alex's Lemonade Stand at the Brooklyn Flea
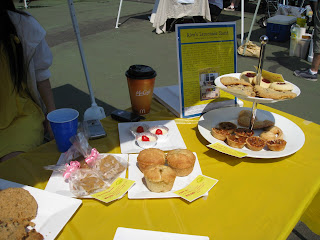
On Saturday, Lemon-Slice and I went to the Brooklyn Flea to fundraise for Alex's Lemonade Stand. We certainly had lemonade, but we decided to come out armed with baked goodies to get more people to come over. We raised a few hundred!
I'd like to thank Eric Demby of the Brooklyn Flea for all of his help and support. The Brooklyn Flea was an excellent venue with a friendly crowd and high foot traffic. We gave out many cards with some information about Alex so they could go onto the website and learn more about her cause. I hope we raised some awareness.
 Here's the cute banner Alex's Lemonade Stand provided us with.
 I used my macaron skills and made Vanilla, Mosaic, and Salted Caramel.
Chocolate Chip cookies, Mini Pecan Pies, Thumbprint Cookies, Palmiers, Mini Apple Pies, Tiny Cheesecakes, and Butterscotch Pecan.
 Blueberry Pies in front of the display on facts about Childhood Cancer.

Lemon-Slice wearing a cute yellow dress to match the mood.

There's also some snickerdoodles and florentine shortbreads.

I'd like to thank Eric Demby of the Brooklyn Flea for all of his help and support. The Brooklyn Flea was an excellent venue with a friendly crowd and high foot traffic. We gave out many cards with some information about Alex so they could go onto the website and learn more about her cause. I hope we raised some awareness.
 Here's the cute banner Alex's Lemonade Stand provided us with.
 I used my macaron skills and made Vanilla, Mosaic, and Salted Caramel.
Chocolate Chip cookies, Mini Pecan Pies, Thumbprint Cookies, Palmiers, Mini Apple Pies, Tiny Cheesecakes, and Butterscotch Pecan.
 Blueberry Pies in front of the display on facts about Childhood Cancer.
Lemon-Slice wearing a cute yellow dress to match the mood.

There's also some snickerdoodles and florentine shortbreads.

Samples out front brought the crowds!
This Friday, lemon-slice will be having a bake sale at her lower school in the hopes to raise some more funds before we send in our check to Alex's Lemonade Stand.
xoxo,
lemonie
lemonie
2 Days of Macarons at Pierre Herme
I haven't updated in a month. Awful, I know, but it's at least been a busy month. I went to Paris at the end of April and spent 2 days studying macarons at Atelier Pierre Herme. It was incredibly informative and a great excuse to take a few days off of work to go to Paris. While I was there, all I did was eat pastries and desserts. Yumyum.

Here's my meringue whipping away.

When it's done whipping, it looks like this. It shouldn't be below 50 degrees C or else it won't be warm enough to melt the confectioner's sugar.

My piping skills leave much to be desired. Look at that baby in the top left corner.

Here are some rising in the oven.

My partner is filling his with avocado and banana ganache with a chocolate square.

My favorite ones were the cinnamon pistachio with morello cherries.

Here is chestnut and matcha green tea.

My team set up this mandarin compote. I think we all were confused when it set in under 5 minutes.

Since my piping skills are apparently no good, my partner piped the mandarin mousseline onto my macarons.


I packed some to take back to New York.

Here's the batter for the chocolate and nuts cake.

The finished cake!

Brittany Shortbread hanging out in the oven.

Out of the oven!

We didn't have enough to fill up the container. Shame because I really liked these.

Florentine Shortbread. Awesomely delicious with a hint of orange.

About to get chopped.

In a cute container.

Hazelnut crunchies!

Packaged and ready to go.

Fruitcake.

The fruitcake was dipped in a syrup 4-5 times and then topped with...it looks like gummy bears. I'm not sure what it was exactly. I think their translation was off.

Our final presentation. We then had a taste testing and we tried all of the macarons out.
It was a great experience. I only wish the instructor translated more things into English for me because my comprehension of French is next to none. Even so, I learned a lot by watching and I filled up an entire notebook with notes and instructions. Since coming back, I've tried making a few of the macarons and the florentine shortbread. I haven't been as successful, but I swear it has something to do with my oven and baking trays rather than a flaw in what I've learned. Plus, I made the florentine shortbreads in a broken oven! Still came out good, but it took forever.
Here's my meringue whipping away.
When it's done whipping, it looks like this. It shouldn't be below 50 degrees C or else it won't be warm enough to melt the confectioner's sugar.
My piping skills leave much to be desired. Look at that baby in the top left corner.
Here are some rising in the oven.
My partner is filling his with avocado and banana ganache with a chocolate square.
My favorite ones were the cinnamon pistachio with morello cherries.
Here is chestnut and matcha green tea.
My team set up this mandarin compote. I think we all were confused when it set in under 5 minutes.
Since my piping skills are apparently no good, my partner piped the mandarin mousseline onto my macarons.
I packed some to take back to New York.
Here's the batter for the chocolate and nuts cake.
The finished cake!
Brittany Shortbread hanging out in the oven.
Out of the oven!
We didn't have enough to fill up the container. Shame because I really liked these.
Florentine Shortbread. Awesomely delicious with a hint of orange.
About to get chopped.
In a cute container.
Hazelnut crunchies!
Packaged and ready to go.
Fruitcake.
The fruitcake was dipped in a syrup 4-5 times and then topped with...it looks like gummy bears. I'm not sure what it was exactly. I think their translation was off.
Our final presentation. We then had a taste testing and we tried all of the macarons out.
It was a great experience. I only wish the instructor translated more things into English for me because my comprehension of French is next to none. Even so, I learned a lot by watching and I filled up an entire notebook with notes and instructions. Since coming back, I've tried making a few of the macarons and the florentine shortbread. I haven't been as successful, but I swear it has something to do with my oven and baking trays rather than a flaw in what I've learned. Plus, I made the florentine shortbreads in a broken oven! Still came out good, but it took forever.
Sunday, April 12, 2009
Happy Easter and Peanut Butter Cupcakes!

Happy Easter! It's been such a relaxing weekend. I've been sitting around and catching up on leisure activities.
Last week, I was down by my old neighborhood to watch Tulpan at the Film Forum. I got there early and had some time to kill, so I finally stopped by Sweet Revenge on Carmine & Bedford. Confused by all the booze and sweets, I ordered the namesake Sweet Revenge - a peanut butter cake, ganache filling with peanut butter buttercream. The base was unremarkable (completely did not know it was peanut butter until I looked it up online), the ganache seemed misplaced, but they seemed to compliment the frosting perfectly. I had been toying with the idea of a peanut butter frosting cupcake for NYC's first Cupcake Camp. I've been avoiding experimenting with peanut butter because of a relative's severe allergy, but as I spooned the rich frosting (with a wooden spoon!) into my greedy mouth while waiting for Tulpan to start, I concluded that I'll finally carry through.
I was more interested in coming up with a rich frosting that was both sweet and didn't leave me with the feeling that peanut butter was sticking to the roof of my mouth (can you tell I'm not a peanut butter addict?). I haven't figured out a good base yet...except for the conclusion that i being chocolate is imperative and each cupcake should have a peanut butter cup hidden in the center. I did come up with the right frosting.
Peanut Butter Frosting
Frosts 12-15 cupcakes
1/2 c butter (1 stick)
1/2 c peanut butter
2 1/4 c powdered sugar
2 tsp vanilla
4 tbsp milk (Use as needed)
1) Blend butter and peanut butter in a mixer. Add powdered sugar and mix until lumps have disappeared (will appear grainy). Blend in vanilla. Add milk as needed. Don't exceed 4 tbsp milk or else frosting will be too liquid.
This is really only for those with an intense sweet tooth. If you don't have a good chocolate cake recipe, try this black magic cake recipe from allrecipes. It's very rich and moist. The coffee taste is barely noticeable and I'm still intrigued that it doesn't use butter...
xoxo,
lemonie

Saturday, April 11, 2009
Palets Aux Raisins

When this recipe showed up in my workbook at ICE, I was reluctant to try this one out because...well...the raisin in the name and the thought of currants in my cookie made me uneasy. However, they turned out much better than I thought! They're no chocolate chip cookies, but still pretty good and super easy to make.
Palets Aux Raisins
4 1/2 oz butter
3 1/2 oz sugar
2 eggs
1 1/2 tbsp dark rum
5 1/2 oz ap flour
3 1/2 oz currants
1) Cream the butter with th esugar until soft and light. Beat in eggs one at a time. Beat in rum, then flour and currants.
2) Pipe on parchment lined sheet pans with 1/2" plain tube. Bake at 350 degrees for about 15 minutes.
xoxo,
lemonie
Sunday, April 5, 2009
Eleni's Cookies
I don't know what exactly took me so long to get to Chelsea Market. I'm sort of disappointed in myself! It's weird...I had known about it, but I neer really thought about it being a place to go to until it was recommended by someone at my gym. So, I planned it into my weekend schedule and I went yesterday.

My goodness! The bakeries are so cute. I also like the transparency to it. I really like looking at kitchens so it was lovely getting to see the dough kneading going on at Amy's Bakery. I didn't buy any bread from there, although I feel like I should have, but I did go into a lot of the other stores to try them out.
Now I'm not going to buy almond flour from anywhere but Buon Italia. I've never seen the flour so fine before...and it's way cheaper than the stuff I pick up at Whole Foods. Fat Witch's brownies were completely disappointing. You would think that if brownies were their specialty, they would be better. Afterwards, they inspired me to make this blondie recipe I've been working on for dinner and they were well received, so it wasn't all bad. I ate my first rugelach yesterday and the judges are still out on that one. Taste good, texture...ehh. But the real treasure of yesterday was finding this cow cookie at Eleni's. Most decorated cookies don't taste very good b/c they need to be firm. This isn't an exceptional cookie, but despite being dry and hard, it's got good flavor. It actually reminds me of something, but I haven't been able to figure out. Right now, my best guess is Nilla Wafers. So, it has more flavor than the typical cardboard tasting cookies...and well...it's a cow. How can I resist the cow? I also wanted to get this googly-eyed dinosaur, but I knew if I ate one cookie, I wouldn't eat the other so I wasn't about to throw away $4 just to own the googly-eyed dinosaur. That's for next time.
Thursday, April 2, 2009
Apple & Pear Strips
So what else can be done with puff pastry? Building on the puff pastry and the almond frangipane from the last post, we can add some fruits and sweets and make another delicious dessert.
This one, I really like...a lot of it is due to aesthetic reasons. I have a particular fondness for shiny foods. Somehow they look more delicious when they glisten. My only real complaint is that I would've liked all my apple/pear slices to be the same size...but to do that would've required the sacrifice of many more apples and pears...and a lot of waste.
Apple Strips
1 lb puff pastry
1 egg for egg wash
1 lb almond frangipane
4 golden delicious apples
1 oz melted butter
2 oz apricot glaze
Optional Finishing: Sliced Almonds and Confectioners' sugar
1) Roll dough into a rectangle approximately 14"x18". Allow dough to rest in refridgerator for about an hour.
2) Cut dough into four 1" strips and two 5" strips. Place the 5 inch strips on a baking pan and dock (take a look at this if you don' t know what that means: Ateco 1357 Dough Docker ). Paint the edges with the egg wash. Apply the 1" strips to the long sides. Press down on edge with the pointer and middle finger approximately 1/2 inch apart. Cut through all layers by taking a knife and slicing the dough between your fingertips at ~1/2 inch intervals. This is to get the 1" and the 5" strips to stick to each other. Refrigerate until firm.
3) Pipe frangipane between the 1" strips. Peel, core, and slice apples to 1/8" thick. Fan slightly and place over frangipane. Brush with melted butter and brush the edges with egg wash.
4) Bake at 350 degrees until the pastry is well colored (check the sides to make sure they aren't white), ~30 minutes.
5) Brush apples with apricot glaze.
Optional: If your sides didn't rise evenly or doesn't look very good, you can top with almonds or confectioners sugar to hide the "flaw."
If you want to do the pear version, poach some pears and follow same instructions. Note: Pears don't have be sliced as thinly.
Poached Pears
Cold water
1/2 oz lemon juice
1 1/4 lbs ripe pears
1/2 lb granulated sugar
1/4 vanilla bean
1) Combine water and lemon juice in a large pan.
2) Peel, halve, and core pears. Add to pan. Add sugar and vanilla.
3) Cover with parchment paper cut to fit inside the pan with a hole in the center (prevents the pears from getting too colored). Bring to a boil and remove from stove. Allow to cool.
I really like puff pastry. It might also be because I really like butter. However, mixing puff pastry with a nice fruit and the sweet taste of apricot...wowweee. The only downer is that this is definitely not as good the second day. In fact, it gets sort of stale and that's not cool! Or maybe that's just an excuse to eat it all in a day.
xoxo,
lemonie
This one, I really like...a lot of it is due to aesthetic reasons. I have a particular fondness for shiny foods. Somehow they look more delicious when they glisten. My only real complaint is that I would've liked all my apple/pear slices to be the same size...but to do that would've required the sacrifice of many more apples and pears...and a lot of waste.

Poached Pears on the left, Apples on the right
So to make these...Apple Strips
1 lb puff pastry
1 egg for egg wash
1 lb almond frangipane
4 golden delicious apples
1 oz melted butter
2 oz apricot glaze
Optional Finishing: Sliced Almonds and Confectioners' sugar
1) Roll dough into a rectangle approximately 14"x18". Allow dough to rest in refridgerator for about an hour.
2) Cut dough into four 1" strips and two 5" strips. Place the 5 inch strips on a baking pan and dock (take a look at this if you don' t know what that means: Ateco 1357 Dough Docker
3) Pipe frangipane between the 1" strips. Peel, core, and slice apples to 1/8" thick. Fan slightly and place over frangipane. Brush with melted butter and brush the edges with egg wash.
4) Bake at 350 degrees until the pastry is well colored (check the sides to make sure they aren't white), ~30 minutes.
5) Brush apples with apricot glaze.
Optional: If your sides didn't rise evenly or doesn't look very good, you can top with almonds or confectioners sugar to hide the "flaw."
If you want to do the pear version, poach some pears and follow same instructions. Note: Pears don't have be sliced as thinly.
Poached Pears
Cold water
1/2 oz lemon juice
1 1/4 lbs ripe pears
1/2 lb granulated sugar
1/4 vanilla bean
1) Combine water and lemon juice in a large pan.
2) Peel, halve, and core pears. Add to pan. Add sugar and vanilla.
3) Cover with parchment paper cut to fit inside the pan with a hole in the center (prevents the pears from getting too colored). Bring to a boil and remove from stove. Allow to cool.
I really like puff pastry. It might also be because I really like butter. However, mixing puff pastry with a nice fruit and the sweet taste of apricot...wowweee. The only downer is that this is definitely not as good the second day. In fact, it gets sort of stale and that's not cool! Or maybe that's just an excuse to eat it all in a day.
xoxo,
lemonie
Monday, March 30, 2009
Gateau Pithiviers

Honestly, if someone had kindly informed me of the thousands of things that can be done with puff pastry, I would've started to buy commercial sheets a few years ago and had my way with them. I could have tried a billion different wonderful things by now. It wasn't until I actually labored with them that I discovered all the uses. To be quite honest...the taste of homemade puff pastry is absolutely wonderful, BUT...it's a lot of work and if you're going to get all creative and put extra stuff on the pastry...then perhaps going with puff pastry at the store isn't that big of a deal. It saves a lot of time and you can come up with tons of different uses for it. I know it's not cost effective whatsoever for bakeries to make their own puff pastry dough, so most don't even bother, which is why you shouldn't bad about it. I feel like the time you have to devote to making the dough shouldn't deter you from trying out all of these different recipes. In fact, tons of people should try these out with sheets from the store and if they find one they like...they should take the time to make the dough. It's a true labor of love...
Ok, I'm blabbing b/c I'm like a kid who just discovered a candy store for the first time.
Gateau Pithiviers...has an awful name. It's beyond intimidating to try to pronounce. Truthfully, I'm pretty insecure at pronouncing French names b/c it sounds so much nicer coming out of a French person's mouth than my own. However, it's a lot easier to make than it sounds.
Almond Frangipane
8 oz almond paste
5 oz sugar
4 eggs
8 oz butter, softened
grated zest of 1 lemon
1 1/2 tsp vanilla
2 1/2 oz AP flour
1/2 tsp baking powder
1) Combine almond paste, sugar, and 1 egg in mixer. Beat with paddle on medium speed until smooth.
2) Add butter, lemon zest and vanilla. Beat until smooth, then add eggs one at a time, scraping bowl between each egg.
3) Combine flour and baking powder. Beat until just absorbed.
Notes: Almond paste is pretty much 50% almonds and 50% sugar, but I can't figure out why it has such a distinctive taste. I use a lot of almond flour and I eat a lot of almonds, but they don't taste like that! It took me a while to figure out what it tastes like...it tastes like those cookies that come in plastic containers at the supermarket with sprinkles on them.
This can last in the fridge for weeks and the freezer for months!
This makes more than what's necessary for Gateau Pithiviers, but don't fear...I'll be using it in the next post.
Gateau Pithiviers
2 lbs puff pastry
12 oz almond frangipane
1 Egg for egg wash
1) Roll dough into 11"x22" rectangle. Cut into 2 11" squares. Chill in fridge for about an hour.
2) Place one square on a baking pan covered with parchment paper. Cut out two 10" circles. Mark with a 6" circle in the center (you can just use a bowl to outline these...just press the bowl upside down lightly into the dough to leave a mark). On just one circle, pipe almond frangipane inside the inner (6") circle. Brush egg glaze between the 6" circle and the edge. Press second dough circle on top and press down dough along edge so they stick.
3) Trim edges into a soft star shape (Sorry, hard to describe...kind of like the outline of flower petals. Refer to photo to understand.) using a thin knife. Be sure not to cut near the almond frangipane or else it'll leak out during baking. Brush top with egg wash.
4) Cut hole in the center to allow the steam of the frangipane to escape during baking. Holding the knife at a 45 degree angle, create curved slashes that cut only halfway through the puff pastry on the inner 6" circle. On the edges (the petals), cut X shapes.
5) Bake at 400 degrees for 20 minutes. Lower temperature to 350 degrees and continue baking until pastry is well colored ~40 minutes.
When it comes out, brush with sugar syrup. Combine 8 oz sugar and 1 c water in a saucepan. Bring to a boil over medium heat and cool. This will make it slightly sweeter and much shinier.
p.s. Save your scraps. Wrap them up and throw them in the freezer b/c they're totally still usable!
Notes: Again back to the distinct almond paste taste...it really shines in this piece. I used the frangipane in a tart and was so "ehhh" about it that I didn't even bother putting it up, but it's much better here. I really enjoyed this one! The shape is sort of comical though. On one hand, it's really beautiful just sitting there all delicate and lovely, but when it came to eating it, I felt like a child in a cartoon picking up and eating a shiny flower. Perhaps it's supposed to be eaten in a more delicate way, but I couldn't help myself!
Check out the layers below. Just imagine that there's 1200+ layers of butter folded in dough making up this beauty. It's so light and flaky!

xoxo,
lemonie
Sunday, March 29, 2009
Puff Pastry
Following in the footsteps of the last post...I went back to folding butter in dough to make beautiful layered puff pastry. I've never even used commercial puff pastry before, but I did get the opportunity to taste test between this one and the commercial one. If you've got the time, I totally recommend making your own b/c it tastes so much better.
Rumor has it that the origins of puff pastry was, like many things, an accident. An apprentice making bread realized that he had forgotten to put butter into his dough. So he decided to try to add the butter in later by folding it in. But clearly, the results were very different and the layers puffed up. Chef Jeff at my pastry school jokes that he was probably fired after the discovery and his master took all the credit.
With puff pastry...you can make quite a few delicious treats. More recipes to come (with pictures!) but here are the basics.
Puff Pastry Dough
1 1/2 lb ap flour
8 oz cake flour
1 tbsp salt
1 tbsp sugar
1 pint cold water
1/2 lb soft butter
1) Mix flours together.
2) Dissolve salt and sugar in cold water, set aside.
3) Rub butter into flour until butter disappears (will look sandy when done)
4) Fold the water in gently and set dough aside while preparing the butter.
Note: This "dough" will be really ugly. Don't overwork it...it should look pretty crumbly.
Butter
2 lbs butter
4 oz ap flour
1) Sprinkle flour onto work surface. Coat butter with flour.
2) Pound butter to soften it. Knead it into a square about 1 inch thick and 6-7" on each side.
Forming the puff pastry dough
1) Dust work surface with flour and turn dough out onto it. Press dough into a rough square about 1 inch thick. Leaving the center alone, roll out the four corners into flaps about 1/4 inch thick.
2) Place butter square on the dough. Fold flaps over the butter without stretchign them. Seal dough so that butter doesn't show.
Rolling/Folding Dough
1) On a floured work surface, roll dough into rectangular shape until about 1/4 inch thick. Dust with flour as necessary to keep it from getting sticky.
2) Fold both ends of the dough in towards the center, then fold in half to make 4 layers - which will resemble a book.
3) Position the dough so that the "spine" of the dough book is on the left so that you're rolling in the opposite direction. Dust the surface with flour again and roll out to a rectangle about 12"x30". Fold over like in #2.
4) Wrap dough in plastic and let it rest in fridge up to about 1 hour.
5) Repeat #3 two more times, resting for at least an hour in between.
6) Rest the dough at least 4 hours before use.
xoxo,
lemonie
Sunday, March 15, 2009
Croissants

I had this really intense craving for croissants this past week. Even though I live in New York City, which is the home to some wonderful pastries, I insisted that I make the croissants myself. I found a recipe from epicurious and was a little wary of the brown sugar, but I decided to give it a try. Honestly, it was a lot more work than I anticipated! On top of that, I didn't think I had my rolling pin so I used a wine bottle to do all the rolling. And by the time I got to the last part, I didn't do such a good job with shaping the pieces b/c I wanted to eat them too badly. I filled them with pieces of chocolate or apricot jam. The jam was delicious, the chocolate was pretty good as expected, and the plain ones were just okay.
1 1/2 c warm whole milk
1/4 c packed light brown sugar
1 tbsp plus 1/4 tsp active dry yeast (two 1/4 oz packages)
3 3/4 - 4 1/2 c ap lfour
1 tbsp kosher salt
3 sticks cold unsaltedbutter
1) Make dough: Stir together warm milk, brown sugar, and yeast in bowl of standing mixer and let stand until foamy, about 5 minutes. (If it doesn’t foam, discard and start over.) Add 3 3/4 cups flour and salt and mix with dough hook at low speed until dough is smooth and very soft, about 7 minutes.
2) Transfer dough to a work surface and knead by hand 2 minutes, adding more flour as necessary, a little at a time, to make a soft, slightly sticky dough. Form dough into a roughly 1 1/2-inch-thick rectangle and chill, wrapped in plastic wrap, until cold, about 1 hour.
3) Prepare and shape butter:After dough has chilled, arrange sticks of butter horizontally, their sides touching, on a work surface. Pound butter with a rolling pin to soften slightly (butter should be malleable but still cold). Scrape butter into a block and put on a kitchen towel, then cover with other towel. Pound and roll out on both sides until butter forms a uniform 8- by 5-inch rectangle. Chill, wrapped in towels, while rolling out dough.
5) Roll out dough: Unwrap dough and roll out on a lightly floured surface, dusting with flour as necessary and lifting and stretching dough (especially in corners), into a 16- by 10-inch rectangle. Arrange dough with a short side nearest you. Put butter in center of dough so that long sides of butter are parallel to short sides of dough. Fold as you would a letter: bottom third of dough over butter, then top third down over dough. Brush off excess flour with pastry brush.
6) Roll out dough: Turn dough so a short side is nearest you, then flatten dough slightly by pressing down horizontally with rolling pin across dough at regular intervals, making uniform impressions. Roll out dough into a 15- by 10-inch rectangle, rolling just to but not over ends.
Brush off any excess flour. Fold in thirds like a letter, as above, stretching corners to square off dough, forming a 10- by 5-inch rectangle. (You have completed the first "fold.") Chill, wrapped in plastic wrap, 1 hour.
7) Make remaining "folds":Make 3 more folds in same manner, chilling dough 1 hour after each fold, for a total of 4 folds. (If any butter oozes out while rolling, sprinkle with flour to prevent sticking.) Wrap dough tightly in plastic wrap and chill at least 8 hours but no more than 18 (after 18 hours, dough may not rise sufficiently when baked).
8) Shape as desired depending on fillings. Place on prepared baking sheets, cover with greased plastic wrap and allow to rise until they have doubled in size.
9) Bake in oven preheated to 400 degrees for about 15 minutes or until golden brown.
Note: If you want the shiny crispy look, brush the top with an egg wash.
I really loved seeing the layers puff up, especially knowing how much work went into making each one.
I really loved seeing the layers puff up, especially knowing how much work went into making each one.
xoxo,
lemonie

Friday, March 13, 2009
Cream Puffs!

I had always been under the impression that the pastry part of cream puffs actually had a taste. Having now actually tried the shell, I can say, they taste like...nothing. Well, they have a taste, but it's very bland and chewing on snow is probably more fulfilling. I had also always believed that these would be a lot more difficult to make than they really were. They're not as moody as a lot of other things (yeah, I'm talking about you, macarons!), as long as you know the rules (like you've ruined everything if you open the oven within the first 20 minutes of putting them in).
However, these little babies are absolutely wonderful when filled. I wonder who ever came up with this puffy little creature and decided to use it as a casing for something a little...let's face it...sloppy. Also, I'm not sure I'd eat pastry cream by itself. I'm not sure what my aversion is to dipping a spoon in and licking it clean, but the bland shell gives just the right texture for me to want to pop the whole thing into my mouth...that is, if it can fit!
Anyway, the puff pastry/eclair shell goes by the name Pate a Choux and recipe is below!
Pate a Choux
1/2 pint water
3 oz butter - cut into cubes
1/4 tsp salt
5 oz all purpose flour
5 large eggs
1) Combine water, butter, and salt in a large pan over medium heat. Bring to a boil, stirring occasionally.
2) Remove pan from heat, add flour all at once, stirring until smooth (will look like mashed potatoes)
3) Cook flour paste until the paste dries slightly and begins to leave the sides of the pan (looks like sugar cookie dough)
4) Transfer to electric mixer bowl, beating on lowest speed for about 30 seconds to release steam. Add eggs 2 at a time. Hold off on last egg to see if it's even necessary. The batter shouldn't be too wet, nor too dry. To test, run your finger through the batter. If you can see where your finger just passed for a few seconds and before the batter starts to flow back together, then you're set!
6) Pipe into desired shape. Bake at 400 degrees for 20 minutes before starting to check for doneness (this goes back to you not opening the door at all or else they'll fall!). Pastries are done when they feel weightless.
The story behind this not opening the door business...
So the way this thing works is that you put together this little batter and when it goes into the oven the steam inside causes it to rise. If you were to open the oven, the steam gets released and the whole thing comes crashing down. You want to wait until they've not only risen, but have hardened into that shape. Then you need to let it dry out and become...a virtually weightless shell!
Piping options include the traditional eclair shape, Paris-Brest (ring), choux puffs (small cream puff circles!), and choux a la creme (bigger circles). The Paris-Brest is made of an outer circle, an inner circle touching it, and a ring piped on top of the two. They'll somehow rise into a single ring like above.
As for fillings, fill it up with pastry cream. For this one, I stuck to my 1/2 oz of vanilla and it was delicious. If you want praline pastry cream, just add 6 oz of praline paste. For coffee flavor, add 1 tbsp of instant espresso dissolved in 1/2 oz (1 tbsp) of boiling water.
To fill, for larger ones, you can just slice off the top and using a pastry bag, pipe in the cream. For smaller ones, you can poke a hole in the bottom using the tip of a knife and then fill in until full.
To top, I used an easy hard caramel and chocolate glaze as well as some regular old powdered sugar and some fondant.
Hard Caramel Glaze
1/2 lb granulated sugar
1/2 tsp lemon juice
1) Combine sugar and lemon juice in a clean saucepan, stirring until the sugar resembles wet sand.
2) Place on medium heat, don't stir until sugar starts to melt and center starts to smoke. Stir slowly.
3) Continue until caramel is desired color. Remove from heat immediately.
If you're going to top with this, dip 1/3 of the shell into the caramel. Place a slice of almond if you want on top, and let cool. Do this prior to filling.
Chocolate Glaze
3 oz water
3 oz light corn syrup
8 oz granulated sugar
10 oz semisweet/bittersweet chocolate, chopped
1) Make a syrup from the water, corn syrup and sugar. Combine in saucepan over medium heat and bring to a boil, stirring often. Wipe sides of pan with a brush dipped in cold water to prevent sugar from sticking to the sides.
2) Remove from heat when the syrup starts to boil and add chocolate. Let stand for r2 minutes and whisk smooth.
3) If glaze thickens, reheat as necessary or add up to 1 tbsp of water.

Final notes: Stick in fruit if you're feeling healthy! I brought these to work and got rave reviews. However, I think anyone will give rave reviews to free food in general. Unless it's so awful you can't bring yourself to lie. And my eclair up there looks like a mummy.
Thursday, March 5, 2009
Thumbprint Cookies

I moved this week into a beautiful new place and I've had a lot of fun testing out the new kitchen. Today, Joe came over to help create my first meal here. He took charge of the chicken cordon bleu, and I made my beautiful white bread and some yummy thumbprint cookies.
I love thumbprint cookies b/c they taste sort of healthy due to the jam in the center. Since I just moved in, I don't have very much on hand...but I went out and bought a safe bet - strawberry jam. Today's recipe came from my favorite site for suggestions: allrecipes
Thumbprint Cookies
3/4 c butter
1/2 c sugar
2 egg yolks
1 3/4 c flour
1/2 c fruit preserves/jam, any flavor
1) Preheat oven to 375 degrees.
2) In a medium bowl, cream together the butter, sugar, and egg yolks. Mix in flour a little at a time until a dough forms.
3) Rough doll into 1 inch balls. Place 2 inches apart onto ungreased cookie sheets. Make a dent in the center of each cookie (I use the back of a melon baller b/c my thumb always leaves uneven holes). Fill with 1/2 tsp of jam/preserves.
4) Bake for 8-10 minutes or until the the bottom of the cookies are golden brown.
Notes: I would use cold butter rather than softened b/c then the dough will shape better. It might lose shape in the oven b/c of the butter, so if you have some time and can pop your tray into the fridge before putting it in the oven, please do so.
I've made this recipe many times before. It's so soft and delicious!
Monday, February 23, 2009
Wonderful Pecan Pie

For our most recent baking class adventure, we went on to make pecan pie starting with a basic pate sucree recipe. I saw this recipe and I kept nudging my partner and pointing to it. I wanted to make sure we got around to this one.
Lemonade and I went to Norma's for lunch and my Napoleon waffle was so ridiculously rich, I was convinced that I wouldn't be able to eat for days. But when this baby came out of the oven...I already took a bite before it cooled down. Delish! There are so many pecans here and unlike other pecan recipes I've tried out where they were a complement to something else, these pecans take center stage. Lemon Zest said she only wanted to eat the crust, but was completely unimpressed by it. She took a second bite of just the pecan and stayed around to demolish half this pie with me. Yumyum.
Pate Sucree (Your pie base)
Makes at least 3 pie bottoms
1 1/2 lbs all purpose flour
8 oz granulated sugar
1 1/2 tsps baking powder
1 tsp salt
8 oz butter
5 eggs
1) Combine flour, sugar, baking powder and salt. Add in butter in the mixer on the lowest speed. Mix until flour mixture resembles Parmesan cheese.
2) Beat the eggs, add to the flour and butter mixture. Mix until holds together. Scrape out of bowl and cover in plastic wrap. Chill until firm.
Pecan Pie
(makes at least 2 9" pies)
12 oz pecan halves
8 fluid oz dark corn syrup
6 oz granulated sugar
4 oz butter
3 eggs
Pinch of salt
1 fluid oz Bourbon
1) Combine corn syrup and sugar in a saucepan; stir well to mix. Place on low heat and allow to come to a boil, without stirring.
2) Whisk eggs with salt and Bourbon. When syrup boils, remove from heat and add butter, allowing the butter to melt on its own.
3) Whisk hot syrup into egg mixture, slowly, without over beating. Skim foam from surface.
*Note: Skimming the foam is an aesthetics thing. Otherwise, your pie will be foamy looking and hence, unappetizing. I admit that it was kind of disgusting to remove all the foam, but it helps!
You can't really taste the Bourbon. It offers a very subtle aftertaste, which is the only time you can separate the taste from the other gooey goodies. You could also replace the Bourbon with vanilla.
If you want to chocolate-fy this recipe, you can add 4 oz semisweet chocolate in when you add the butter in step 4! Part of me regrets not doing it b/c it smelled heavenly!
Putting the Pie Together...
1) Take the Pate Sucree and shape it into a circle before rolling out. Roll evenly from the center outwards until the dough is very thin. To transfer onto your pie dish, roll the dough onto the rolling pin and then unroll it over the pan.
2) Press the dough into the pan making sure the dough touches the surface. Trim the edges, allowing some excess to be folded over.
3) Fold over the edges and shape as desired.
4) If time permits, return dough to freezer.
5) Fill pan with pecans. Whole 12 oz may not be necessary. Fill until just below pan edge (the dough will rise and the pecan sauce will bubble, so don't go overboard here). Pour sauce over pecans.
6) If necessary, use a fork to press down pecans and make sure they're immersed.
7) Bake at 350 degrees about 40 minutes or until the center is set.
Overall, as excited as I was for this recipe, part of me wondered how good it could possibly be. Then I took it out of the oven....It's sooo good. It's got a ton of pecans in it so it's better than anything store bought. The pecans get well toasted throughout and have a wonderful texture. The sauce also stays gooey at room temperature so the food loving part of me takes the pecans and rubs it into the sauce before popping into my mouth. Yum. It's actually one of the first times where I enjoyed eating the filling more than I enjoyed eating a more balanced piece of filling and crust.

Friday, February 20, 2009
Raspberry Tart with Pastry Cream
Today, Opal gently let me know that I need to update more often. And she's totally right! It's been over a week since my last post, which is pretty unacceptable.

For 1 Tart
4 oz butter (1 stick)
4 oz AP flour
2 oz cake flour (can use AP as well, just don't mix as much)
1/4 c powdered sugar
1/4 tsp salt
1/8 tsp baking powder
1.5 fluid oz cold water
1) Cut the butter into cubes. Combine dry ingredients by rubbing in butter by hand or using a mixer on the lowest speed. It's not necessary to mix until the butter has disappeared, only until the pieces are less than 1/4 an inch in diameter.
2) Stir in water until dough holds together. Do not over mix. The flakiness of the final pastry depends on the dough having some flaky qualities.
3) Wrap in plastic. Chill until firm.
*Note: You don't want the butter to actually melt.
AP flour will yield more gluten than cake flour; however, you can use AP flour in place of cake flour but just be sure not to over mix.
The pastry school advises to use recipes that go by weight b/c it's more accurate. You may note that there's 1/4 c of powdered sugar there. That was my addition b/c it doesn't make any sense to have a crust that's not sweet for a dessert! I think this could have totally used more sugar. Perhaps next time, I'll use granulated sugar instead.
While that's chilling...
Pastry Cream
1 pint milk
2 oz cornstarch
4 oz granulated sugar
1 egg
4 yolks
2 oz butter (1/2 stick)
1/4 oz vanilla (1/2 tbsp)
1) Combine milk with sugar in a saucepan and bring to a boil.
2) In a separate bowl, whisk whole eggs and yolks into cornstarch.
3) Pour 1/3 of the boiling milk into the egg mixture to temper. Whisk the egg mixture into the boiling milk, stirring until the pastry cream thickens and returns to a boil. Boil about 1 minute, making sure to whisk constantly (or chunks will form!).
4) Remove from heat and beat in butter and vanilla. Pour cream into a stainless steel pan and cover with plastic wrap so that it directly touches surface to prevent a skin from forming. Chill immediately until use.
*Note: You pour the boiling milk into the egg mixture to raise the temperature of the mixture. If you pour the eggs directly into the boiling mix, they'll cook and that's gross!
When I made this, we swapped out the vanilla for 1 oz of raspberry flavored vodka. It's a lot of liquid for the cream to hold, but we felt that much was necessary in order to taste it. To be honest though, I'm always a bit wary about having flavored alcohol in my food. Sometimes it's a little too overwhelming and in this case, I think the 1 oz was a bit overboard. I'm sure the vanilla would've tasted better and it's obviously the better choice if you're making this for kids.
To assemble...
1) Roll the dough into a circular disk and use it to line an 8-inch tart pan. Trim away the excess. Chill the dough (you don't want the dough to get too hot until you actually bake it).
2) To bake the shell, place a sheet of parchment paper over the dough and weigh it down with beans or similar weighty object. This is to prevent the shell from shrinking as it bakes. Bake at 350 degrees for about 25 minutes or until set. Let shell cool down and remove beans and parchment.
3) Spread pastry cream evenly in tart shell. Cover with fruit as desired. Can glaze with peach or apricot glaze.
*Note: I obviously used raspberries. The glaze is totally for shininess, but b/c the taste would've conflicted with the raspberries, my tart is unglazed.
Overall, it was pretty good, but not "wow". It was beautiful to look at. My only complaint is that I think we added too much alcohol so next time, I'll stick to the vanilla.
xoxo,
lemonie
So today, I give you recipes for flaky pastry dough and for pastry cream. I made this in my class to produce a lovely raspberry tart.
Flaky Pastry Dough
For 1 Tart
4 oz butter (1 stick)
4 oz AP flour
2 oz cake flour (can use AP as well, just don't mix as much)
1/4 c powdered sugar
1/4 tsp salt
1/8 tsp baking powder
1.5 fluid oz cold water
1) Cut the butter into cubes. Combine dry ingredients by rubbing in butter by hand or using a mixer on the lowest speed. It's not necessary to mix until the butter has disappeared, only until the pieces are less than 1/4 an inch in diameter.
2) Stir in water until dough holds together. Do not over mix. The flakiness of the final pastry depends on the dough having some flaky qualities.
3) Wrap in plastic. Chill until firm.
*Note: You don't want the butter to actually melt.
AP flour will yield more gluten than cake flour; however, you can use AP flour in place of cake flour but just be sure not to over mix.
The pastry school advises to use recipes that go by weight b/c it's more accurate. You may note that there's 1/4 c of powdered sugar there. That was my addition b/c it doesn't make any sense to have a crust that's not sweet for a dessert! I think this could have totally used more sugar. Perhaps next time, I'll use granulated sugar instead.
While that's chilling...
Pastry Cream
1 pint milk
2 oz cornstarch
4 oz granulated sugar
1 egg
4 yolks
2 oz butter (1/2 stick)
1/4 oz vanilla (1/2 tbsp)
1) Combine milk with sugar in a saucepan and bring to a boil.
2) In a separate bowl, whisk whole eggs and yolks into cornstarch.
3) Pour 1/3 of the boiling milk into the egg mixture to temper. Whisk the egg mixture into the boiling milk, stirring until the pastry cream thickens and returns to a boil. Boil about 1 minute, making sure to whisk constantly (or chunks will form!).
4) Remove from heat and beat in butter and vanilla. Pour cream into a stainless steel pan and cover with plastic wrap so that it directly touches surface to prevent a skin from forming. Chill immediately until use.
*Note: You pour the boiling milk into the egg mixture to raise the temperature of the mixture. If you pour the eggs directly into the boiling mix, they'll cook and that's gross!
When I made this, we swapped out the vanilla for 1 oz of raspberry flavored vodka. It's a lot of liquid for the cream to hold, but we felt that much was necessary in order to taste it. To be honest though, I'm always a bit wary about having flavored alcohol in my food. Sometimes it's a little too overwhelming and in this case, I think the 1 oz was a bit overboard. I'm sure the vanilla would've tasted better and it's obviously the better choice if you're making this for kids.
To assemble...
1) Roll the dough into a circular disk and use it to line an 8-inch tart pan. Trim away the excess. Chill the dough (you don't want the dough to get too hot until you actually bake it).
2) To bake the shell, place a sheet of parchment paper over the dough and weigh it down with beans or similar weighty object. This is to prevent the shell from shrinking as it bakes. Bake at 350 degrees for about 25 minutes or until set. Let shell cool down and remove beans and parchment.
3) Spread pastry cream evenly in tart shell. Cover with fruit as desired. Can glaze with peach or apricot glaze.
*Note: I obviously used raspberries. The glaze is totally for shininess, but b/c the taste would've conflicted with the raspberries, my tart is unglazed.
Overall, it was pretty good, but not "wow". It was beautiful to look at. My only complaint is that I think we added too much alcohol so next time, I'll stick to the vanilla.
xoxo,
lemonie
Thursday, February 12, 2009
Bread bread bread!
I've been running myself ragged lately...as evidenced by the fact that I came home at 7:40 last night and was in bed by 8 pm. Hence, I was up this morning at 4. I've already done 1 load of laundry and done about 40% of my homework. Time for me to update!
Last Sunday, the instructor for my baking class is also formerly of Balthazar down in SoHo. The boule we made was ridiculous. Like, it was so delicious I could've eaten the entire thing in one sitting. And the braided bread was so pretty!
Basic Bread Dough
2/3 oz cake yeast (or 1/4 oz dry yeast)
1 pint warm water
1 1/2 lbs high gluten flour
1/2 oz salt
1) Disperse yeast in water with whisk.
2) In mixer with dough hook, add 1 1/2 lbs flour to yeast mixture. Add salt to flour, making sure the salt doesn't touch the yeast (it'll kill the yeast).
3) Knead for 8-10 minutes until dough becomes smooth and elastic. Place in oiled bowl and let rise for 1-2 hours, until doubled.
4) Deflate by pressing down with hands. Divide in half and shape as desired.
For Boule Shape (shown above)
Press each piece into an oval and fold the long sides towards the center. Press out again and repeat. Pince seam at bottom together tightly. Place upside down (smooth round side down) in a well floured bowl or basket. Cover lousely with buttered or pam-sprayed plastic rap and proof (leave out for it to rise again) until doubled ~45 minutes. Carefully invert onto cornmeal dusted baking sheet. Make slashes near top with a razor blade.
5) Preheat oven to 500 degrees and place an empty sheet pan in the bottom of th eoven. Add 1 quart of the water to the pan 5 minutes before the bread has finished rising. Place loaves in the oven and bake until browned, about 10 minutes. Remove pan of water, lower temperature to 400 degrees and continue baking for 20-25 minutes, until well-colored. Remove pans and cool on racks.
Note: Since Sim Cass is apparently the Prince of Darkness, he preferred that the bread stay in there longer for a darker crust.
To know if your bread is done, take it out, flip it over, and tap the crust. If it sounds hollow, it's done.

Braided Bread
6 fluid oz warm tap water
1 1/2 oz compressed yeast or 2 envelopes dry yeast
1 pint water
2 oz sugar
1/2 oz salt
1/2 pint egg yolks
3 fluid oz vegetable oil
2 1/4 lbs high gluten flour
1 egg, beaten with a pinch of salt for egg wash
1) Measure 6 oz water into a bowl and whisk in yeast. Set aside.
2) Place remaining water into mixer bowl and stir in sugar and salt to dissolve. whisk in yolks and oil. Add flour, pour in yeast mixture and mix on low speed until smooth and elastic, about 10-15 minutes.
3) Cover and let rise for about 1 hour, or until doubled.
4) Divide into 18 oz pieces for braided bread.
To shape braids:
5) Divide each 18 oz piece into 6 oz pieces. Round (look at instructions for boule above on how to knead them into the round shape), and roll into a long cylinder that is wider in the center and tapers at the ends. Pinch one end of each piece together and braid (like you would hair!). Brush with egg wash, place on a tray, and let rise until doubled (be sure to cover b/c it'll dry out quickly and form a skin).
6) Bake at 400 degrees for about 20 minutes.
Note: We took the leftover bread and attempted to make hamburger buns. Attempted is the key word. My understanding is that we rushed the round balls into the oven and so we got round balls out. I brought it home and pretended like hamburger buns had never crossed my mind and we just wanted to make sesame covered bread rolls. =)

Last Sunday, the instructor for my baking class is also formerly of Balthazar down in SoHo. The boule we made was ridiculous. Like, it was so delicious I could've eaten the entire thing in one sitting. And the braided bread was so pretty!

Basic Bread Dough
2/3 oz cake yeast (or 1/4 oz dry yeast)
1 pint warm water
1 1/2 lbs high gluten flour
1/2 oz salt
1) Disperse yeast in water with whisk.
2) In mixer with dough hook, add 1 1/2 lbs flour to yeast mixture. Add salt to flour, making sure the salt doesn't touch the yeast (it'll kill the yeast).
3) Knead for 8-10 minutes until dough becomes smooth and elastic. Place in oiled bowl and let rise for 1-2 hours, until doubled.
4) Deflate by pressing down with hands. Divide in half and shape as desired.
For Boule Shape (shown above)
Press each piece into an oval and fold the long sides towards the center. Press out again and repeat. Pince seam at bottom together tightly. Place upside down (smooth round side down) in a well floured bowl or basket. Cover lousely with buttered or pam-sprayed plastic rap and proof (leave out for it to rise again) until doubled ~45 minutes. Carefully invert onto cornmeal dusted baking sheet. Make slashes near top with a razor blade.
5) Preheat oven to 500 degrees and place an empty sheet pan in the bottom of th eoven. Add 1 quart of the water to the pan 5 minutes before the bread has finished rising. Place loaves in the oven and bake until browned, about 10 minutes. Remove pan of water, lower temperature to 400 degrees and continue baking for 20-25 minutes, until well-colored. Remove pans and cool on racks.
Note: Since Sim Cass is apparently the Prince of Darkness, he preferred that the bread stay in there longer for a darker crust.
To know if your bread is done, take it out, flip it over, and tap the crust. If it sounds hollow, it's done.

Braided Bread
6 fluid oz warm tap water
1 1/2 oz compressed yeast or 2 envelopes dry yeast
1 pint water
2 oz sugar
1/2 oz salt
1/2 pint egg yolks
3 fluid oz vegetable oil
2 1/4 lbs high gluten flour
1 egg, beaten with a pinch of salt for egg wash
1) Measure 6 oz water into a bowl and whisk in yeast. Set aside.
2) Place remaining water into mixer bowl and stir in sugar and salt to dissolve. whisk in yolks and oil. Add flour, pour in yeast mixture and mix on low speed until smooth and elastic, about 10-15 minutes.
3) Cover and let rise for about 1 hour, or until doubled.
4) Divide into 18 oz pieces for braided bread.
To shape braids:
5) Divide each 18 oz piece into 6 oz pieces. Round (look at instructions for boule above on how to knead them into the round shape), and roll into a long cylinder that is wider in the center and tapers at the ends. Pinch one end of each piece together and braid (like you would hair!). Brush with egg wash, place on a tray, and let rise until doubled (be sure to cover b/c it'll dry out quickly and form a skin).
6) Bake at 400 degrees for about 20 minutes.
Note: We took the leftover bread and attempted to make hamburger buns. Attempted is the key word. My understanding is that we rushed the round balls into the oven and so we got round balls out. I brought it home and pretended like hamburger buns had never crossed my mind and we just wanted to make sesame covered bread rolls. =)

Subscribe to:
Posts (Atom)